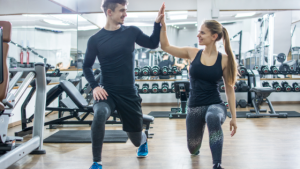
Sore Knees Hiking? Learn How Reverse Lunges Help!
Lots of hikers have sore knees hiking, but most don’t know that reverse lunges can help! Lunges are a great way for hikers to build lower leg strength that supports the knee joint. Unfortunately for most hikers, forward lunges can contribute to sore knees. At a loss for what to do, many just simply quite lunges all-together. Reverse lunges are a perfect solution because they reduce the amount of force going through the knee. This means you get all of the benefits of lunging without sore knees!
In this post, I’ll take you through my favorite reverse lunge variations for hikers. You can even watch the under 3 minute video version of this post here.
Why Reverse Lunges To Help Sore Knees?
 Reverse lunges for hikers allow strengthening for all of the key muscle groups with less pressure through the knee. Forward lunges require the working leg, the forward leg, to absorb the bodyweight as your foot hits the ground. As your foot hits the ground, you must control the movement of the knee and decelerate from the step simultaneously. In addition, the back leg will also have some pressure through the knee as the leg stretches behind you. Some knees just don’t care for this type of motions at all and as a result, hikers skip this valuable exercise.
In a reverse lunge, the working leg is still the forward leg. The difference is when the step is taken backward, the force generated stays in the hips, not through the knee. This is a simple solution for many it may be just the solution to ease your sore knees. But building the lower leg muscles, you can support the knees, further reducing soreness and in
Easier But Just As Effective!
That’s right! Eliminate sore knees with reveres lunges. Because your front foot is staying stationary, you don’t have to control the knee motion as much. You also have better balance, which makes this a perfect option for beginners. For my clients, I have them start with reverse lunges and progress from there. Reverse lunges for hikers are easy to scale for any ability, so let’s take a look at what options might work best for you.
Quick note on form:
- in the bottom position of a lunge, your knee, hip and shoulders should be lined up.
- Keeping the core braced, press through the entire front foot to return to standing.
- As you come up, contract your glutes – they are the main muscle to visualize during the exercise.
- Knee does NOT need to touch the floor.
- Your knee may go past your toes, this is ok! However, if you have pain, try to keep your knee over your foot or ankle more.
Reverse Strap Lunges
For hikers who need to build up strength in the legs, this is an excellent option to start with. By using a strap, rolled up bed sheet, dog leash or rope that is anchored off, you can use your upper body to assist you. Don’t be fooled by the strap, the legs still get a wonderful amount of work here!
Reverse Lunges
Progressing up from the strap version, we have the regular reverse lunge. To perform this movement, take a step about 2 feet backwards and slowly lower down. To return to standing, simply press through the entire front foot to come back up. Squeeze your glute muscles as you come back up to the start position.
Reverse Lunges Form A Step
Finally, the more difficult reverse lunge from a step variation. Your back leg may not touch the ground here due to the increased motion. With the front leg on a step, block or weight plate, the muscles will have more range of motion to work through. By increasing the range of motion and keeping the muscle under tension longer, the exercise becomes more challenging.
Give Reverse Lunges A Try!
Give these reverse lunges for hikers a try if you deal with sore knees during lunges. The video is short and sweet and will give you a nice visual to work along with. As always, reach out with any questions and happy lunging!


Recent Comments