If you are looking for a great top 5 list of stretches, give these a try! There are endless variations and options for stretching. The nice thing about stretching for hiking is there really isn’t a wrong answer. Choose your own adventure and pat yourself on the back for doing some stretching rather than none.
Be sure to like our Facebook page and follow us on Instagram and Twitter!
Stretching should be gentle and pain-free! Perhaps it “hurts good” and that’s cool, but don’t overdo it, Gumby. Concentrate on the breath: in through the nose, out through the mouth. I like to imagine my midsection expanding out in all directions (front, back, sides) with a deep inhale. It will make the stretches more effective, and it’s how you were meant to breathe.
This is by no means going to suit everyone’s needs, so use what you like and substitute with your favorite stretches freely. These are in no particular order.
YouTube offers numerous variations and tips for these, so if you have any questions about the form, that would be a wise resource to utilize.
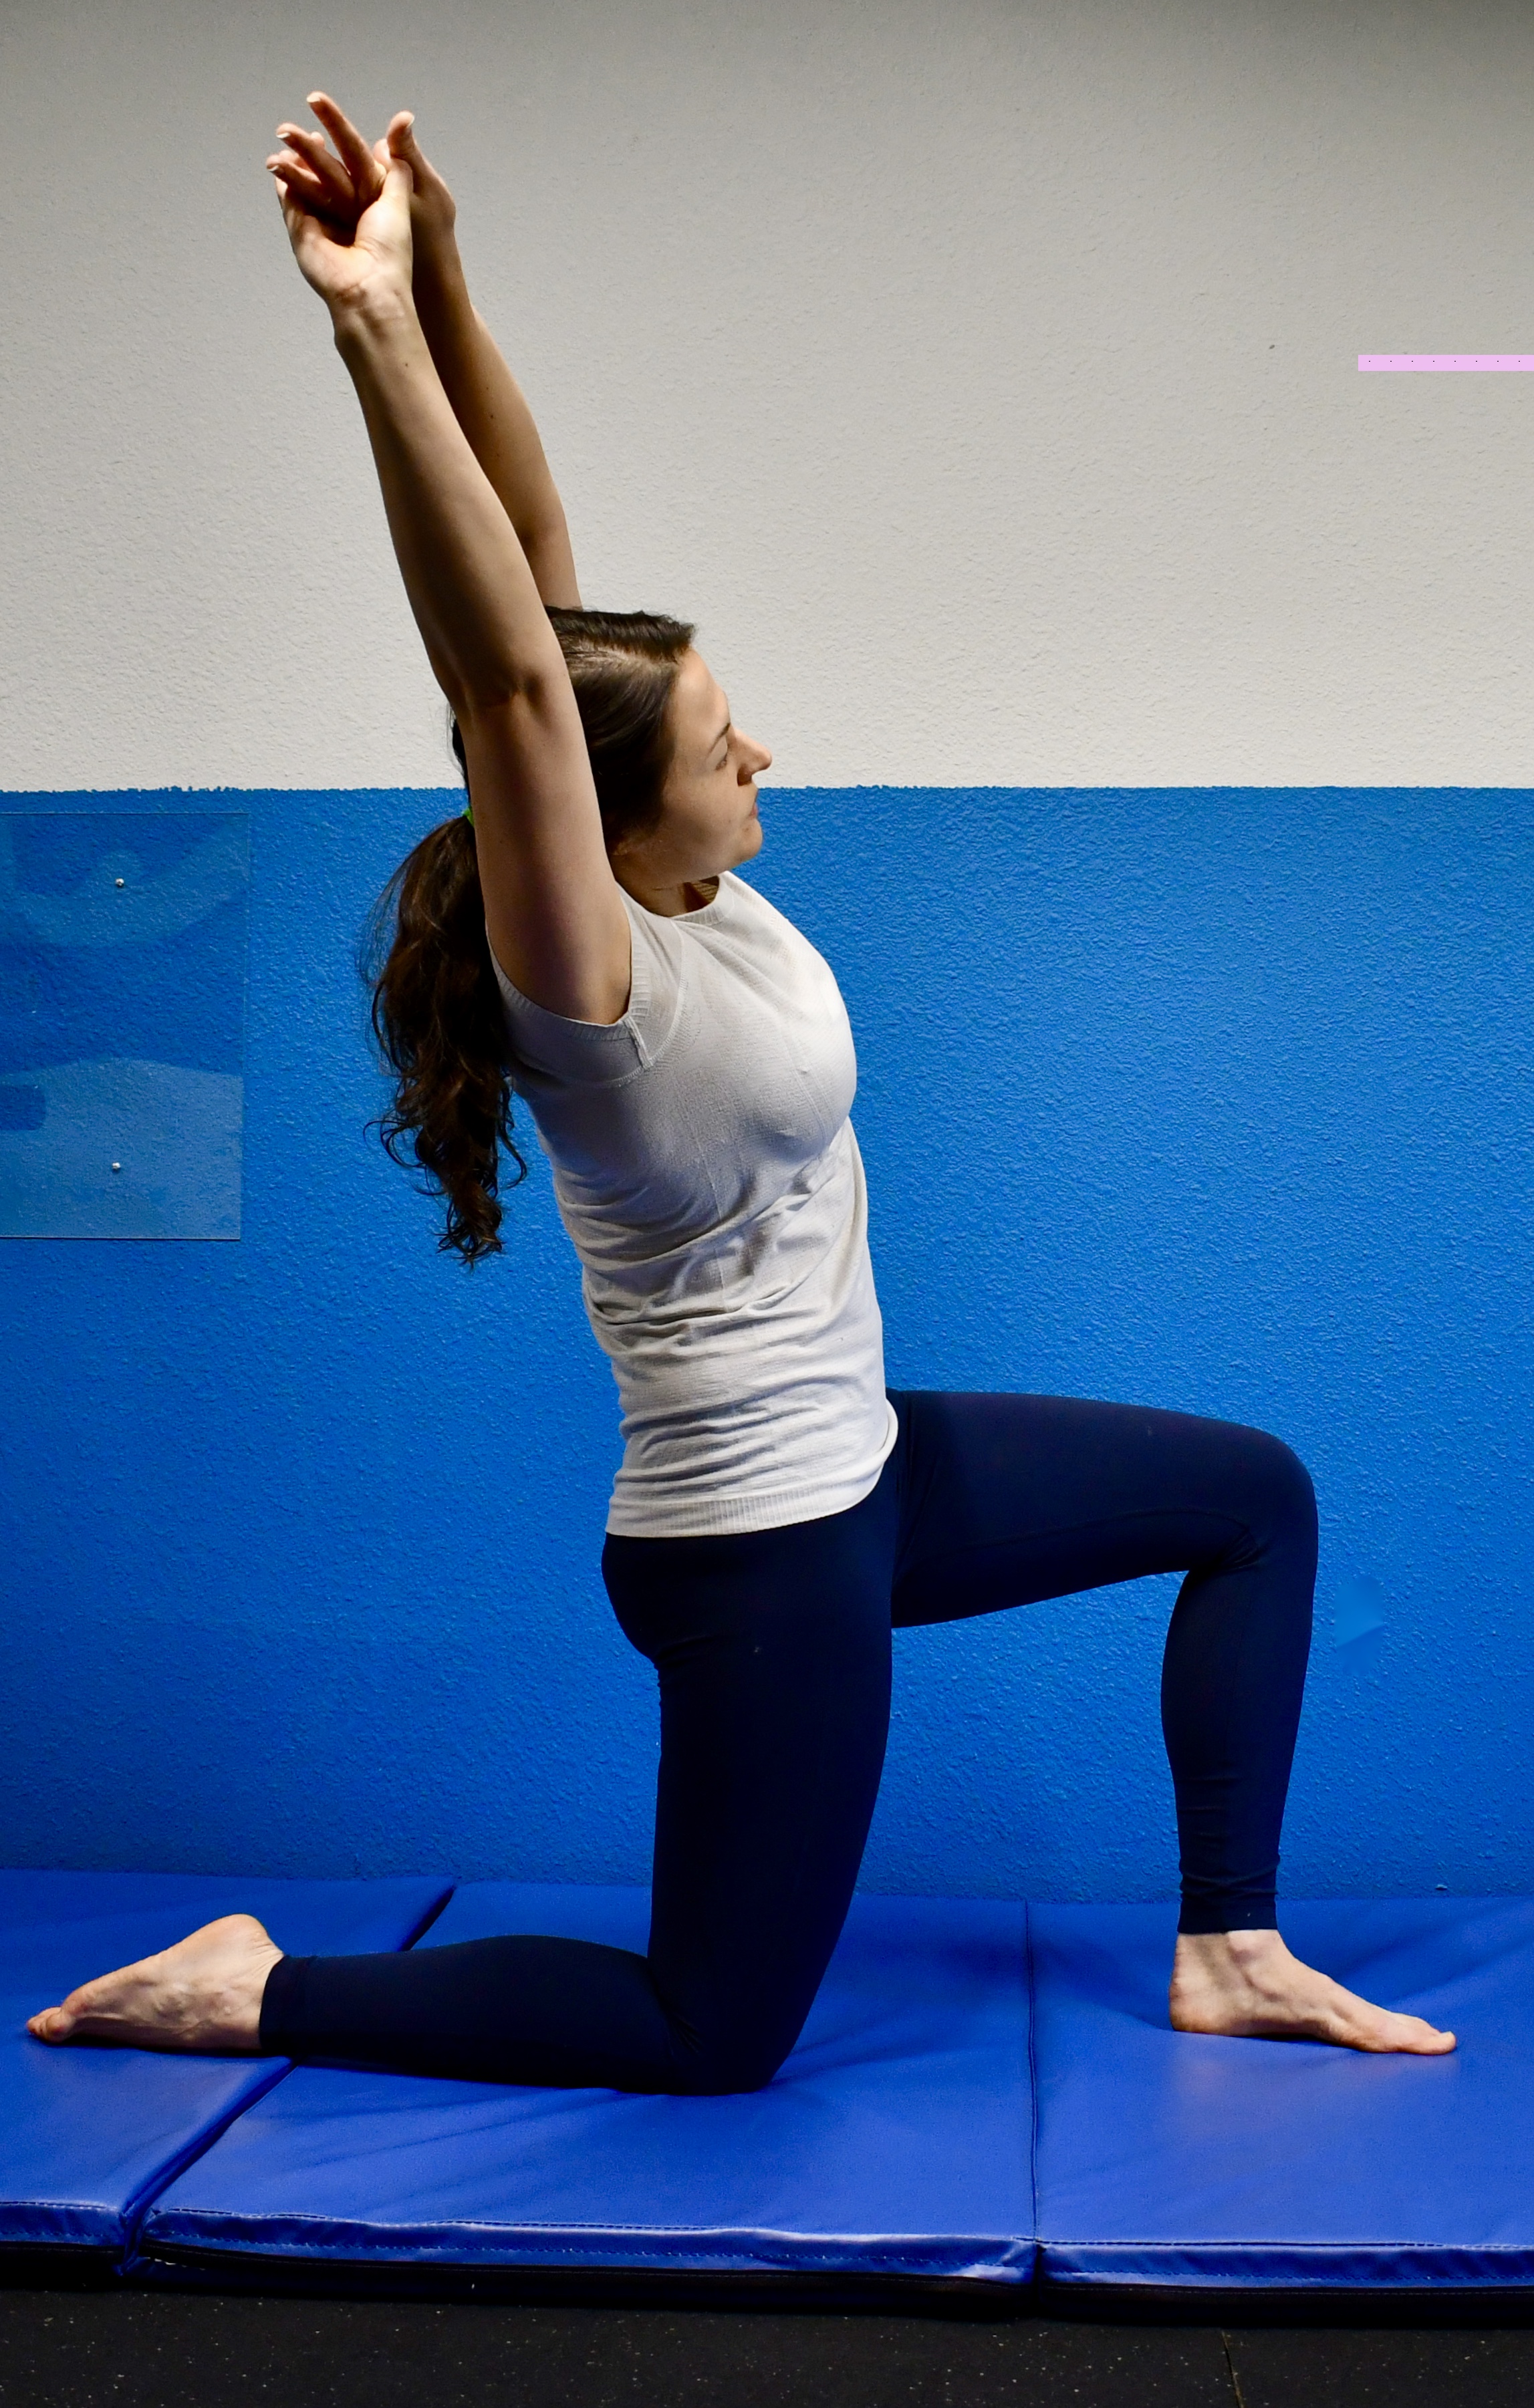
Samson Stretch
Samson Stretch
Why it’s great
- Targets the hip flexors, lats, back, shoulders, arms.
Not only will this target the tight hips and quads, but it will also incorporate the lats and arms for a nice stretch. Breath deep into your stomach to hit the diaphragm and little rib muscles; they work hard during those hill climbs!
To Perform
- Raise your arms overhead pressing your arms to your ears (keep the shrugging of shoulders to a minimum).
- Step into a lunge position with the trailing knee touching the floor.
- Actively reach for the ceiling while keeping your chest open (no hunch backs) and slightly side bend as you push your hips forward in the lunge position.
- Keep your glutes engaged as you push your hip points forward.
- Repeat on the other side.
- Hold this pose for 20-30 seconds, repeating 3-4 Â times each side.
Download our FREE 12 week training program for hikers!
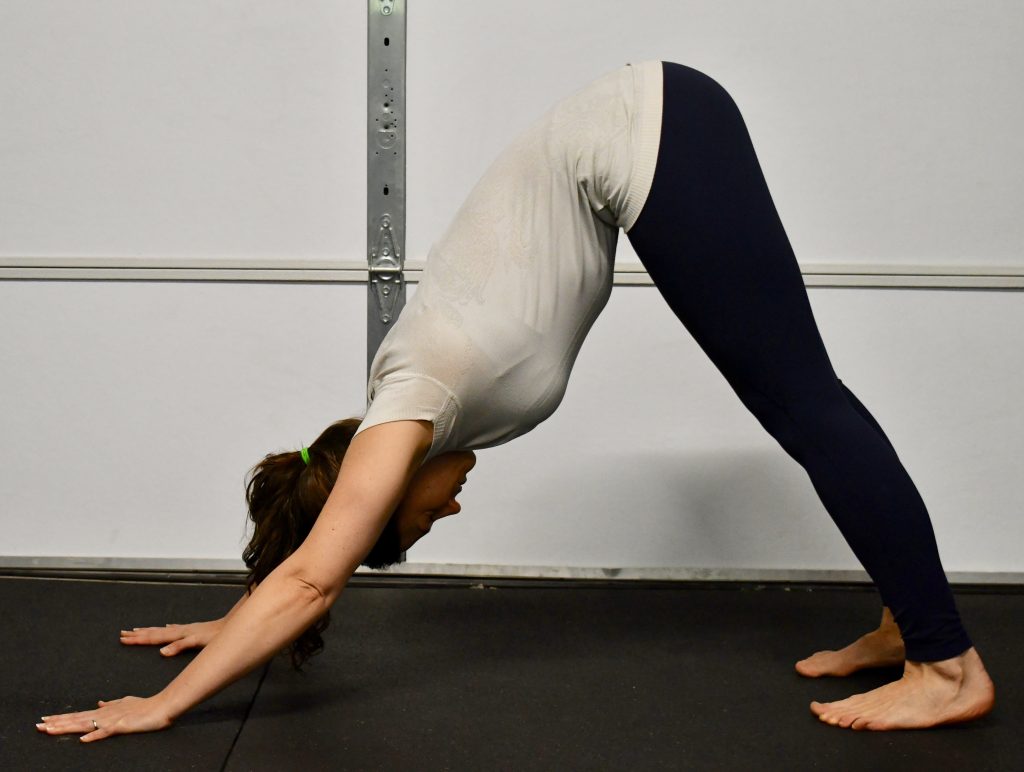
Downward Dog
Downward Dog
Why it’s great
- Targets hamstrings, calf muscles, arches, shoulders, back.
Such a great all around position to target so many muscles! This one feels great after a rough night of sleep or after a long day with a pack on. There is a wide range of tips and tricks to really dial this one in; this is a basic version for you.
To Perform
- The body is positioned with the palms and feet about shoulder width apart.
- The arms are straight, legs may have a slight bend or be straight.
- The weight of the body is equally distributed between the hands and the feet.
- The “elbow pit” points forward with webbing between thumb and forefinger pointing forward.
- Shoulder blades are down and back; imagine putting your right shoulder blade in your left back pocket, and the left shoulder blade in the right back pocket.
- Avoid rounding your back; if it does, simply bend at the knees to keep your back straight.
- The neck is relaxed, head heavy, and eye gaze between your two feet.
- Practice the pose for 1-3 minutes total; repeating throughout the day.
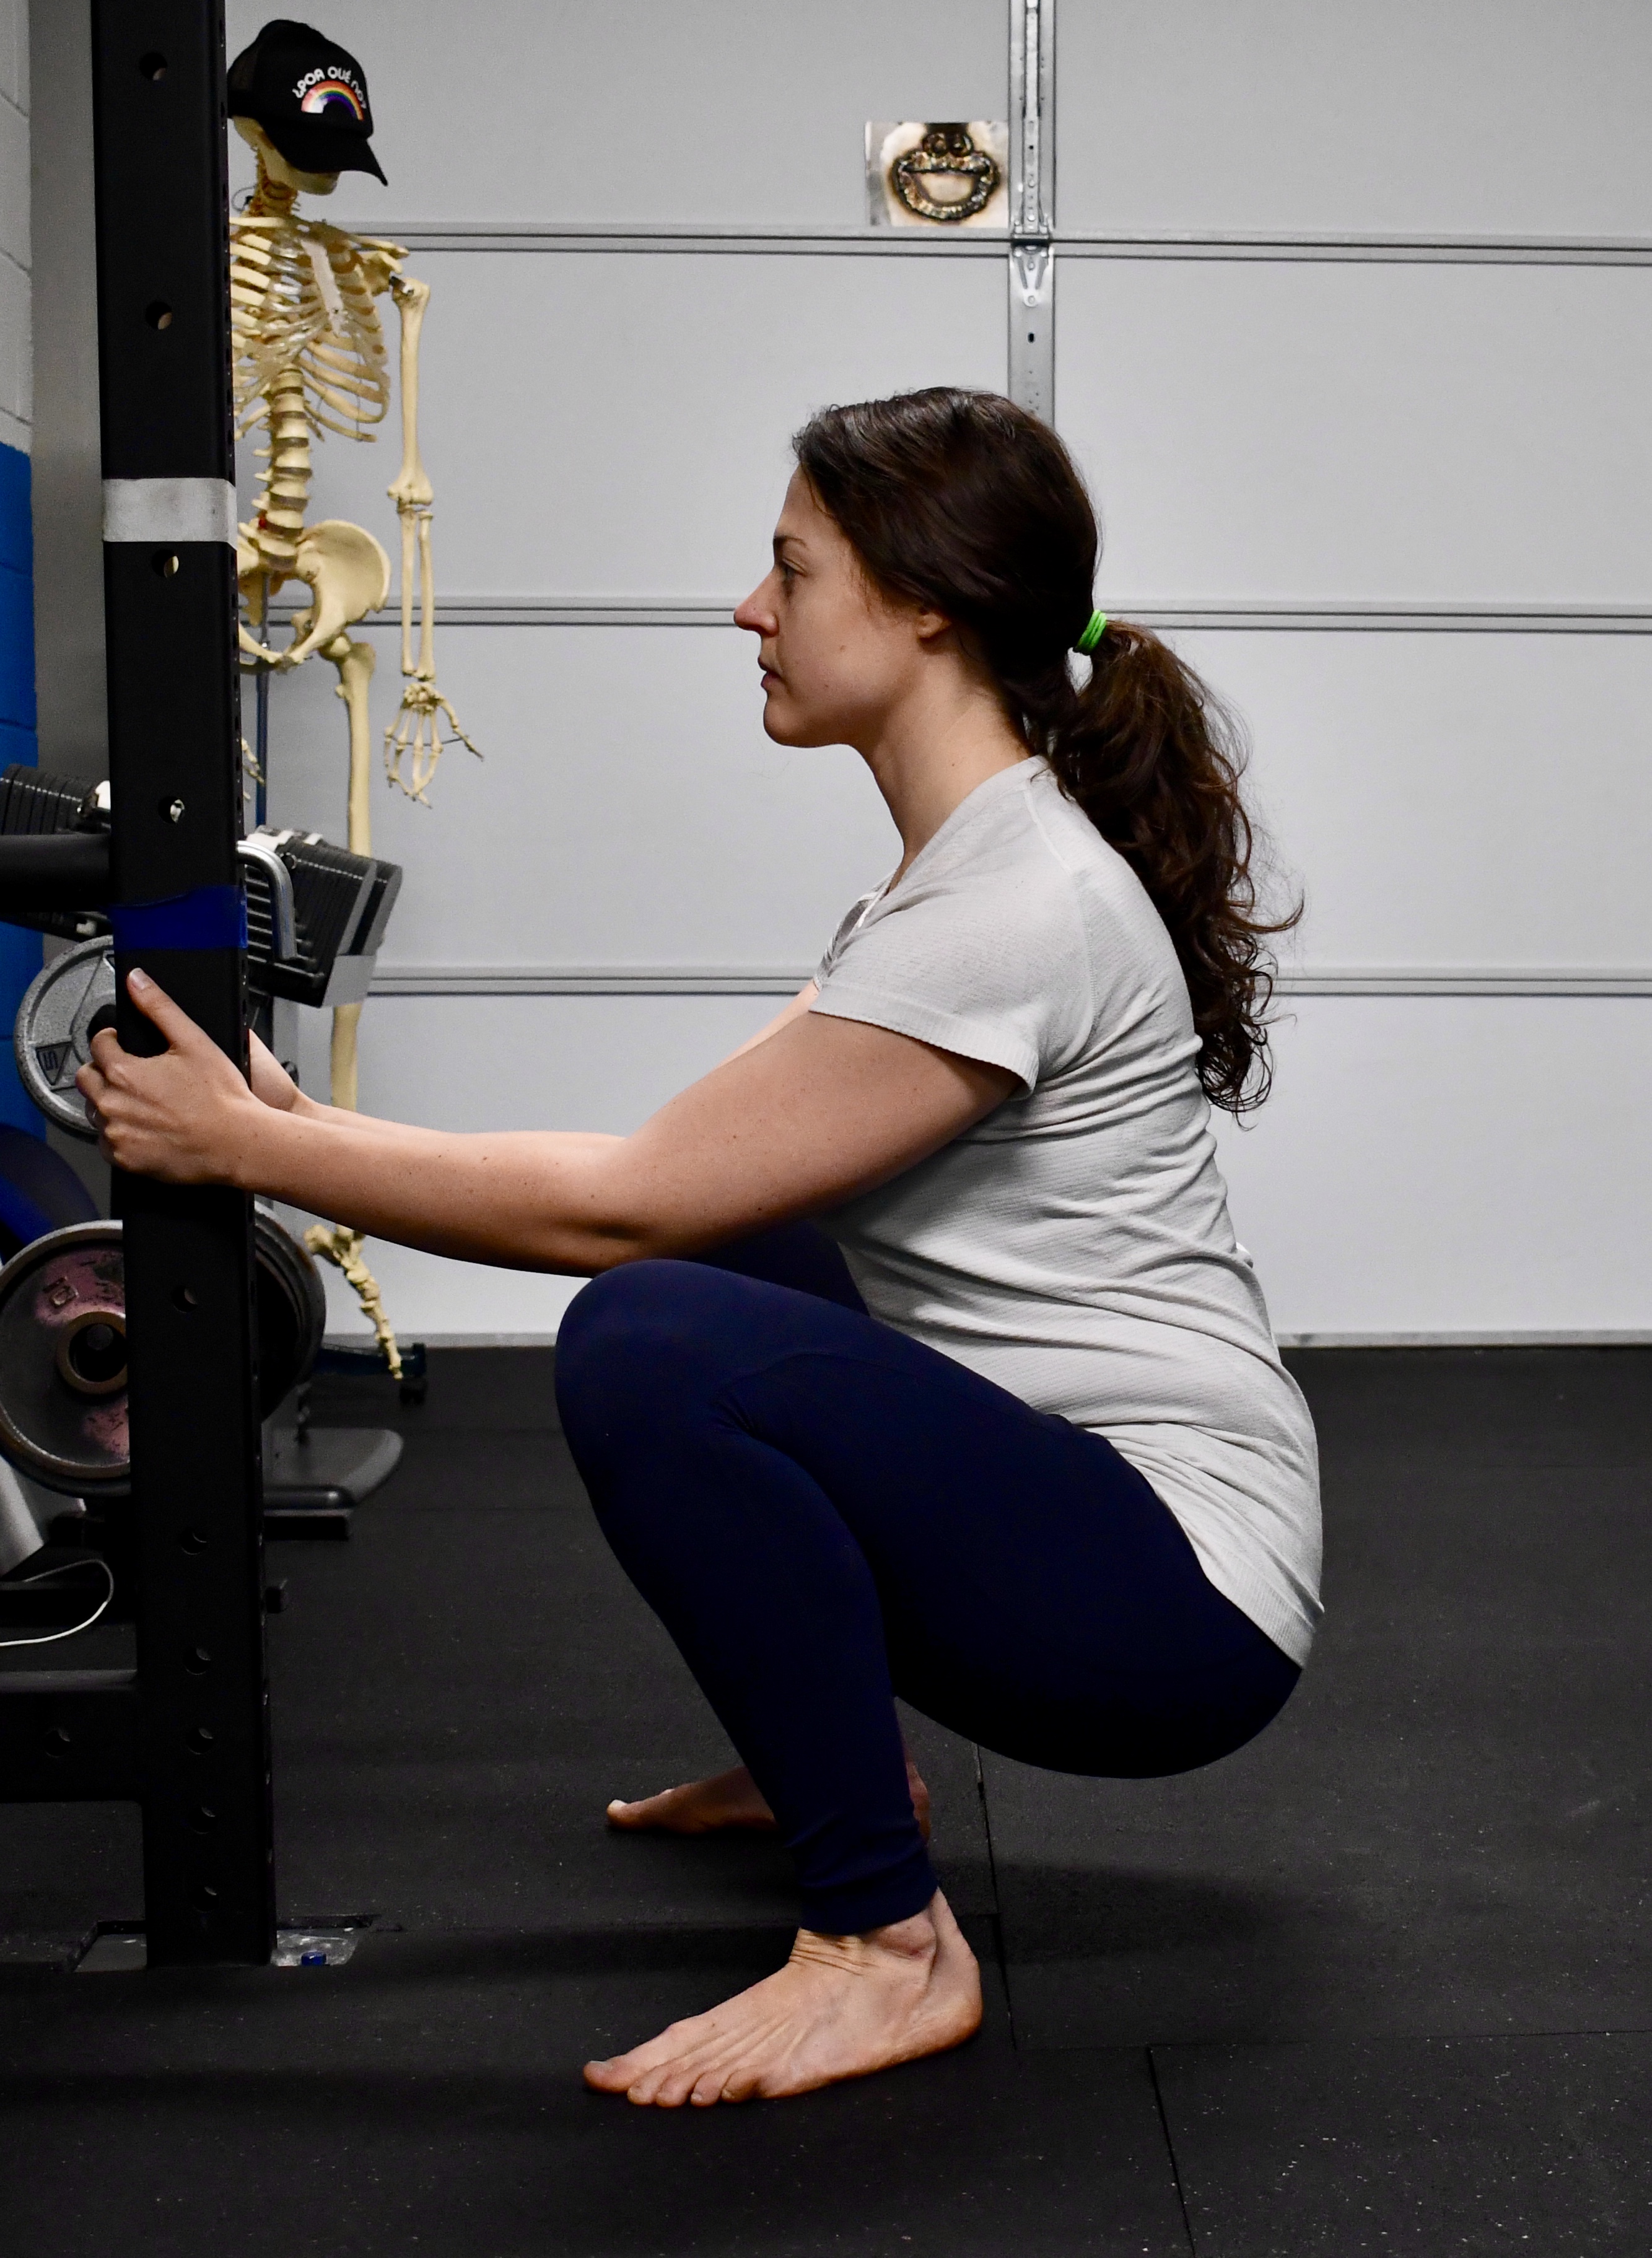
Deep Squat Sit
Deep Squat Sit
Why it’s great
- Targets the hips, knees, back, groin, ankles.
Hiking uses a relatively small range of motion for the hips; with such a short range of motion, the hip structures can get tight. Having tight hips will ultimately limit how much motion your hips will give you. By dropping down in the stretch in the morning, noon and evening breaks, you can keep those hips happy and limber. It also does wonders for the knees and ankles!
To Perform
- Sit back into a squat position with feet around shoulder width apart, toes pointing slightly outward. Using a tree, weight rack, or similar object for stability as needed will help you sit lower; you may not need support if your mobility is adequate.
- Try to keep the weight in your feet, not through the arms if using support.
- The torso is strong and engaged; this is an active stretch position!
- Engage your glutes by driving your knees outward and keep this active as long as you are down in the squat position.
- Head is neutral, looking straight ahead.
- Push the knees back to stand back up.
- Practice 1-3 minutes, repeating throughout the day.
Figure 4 Stretch
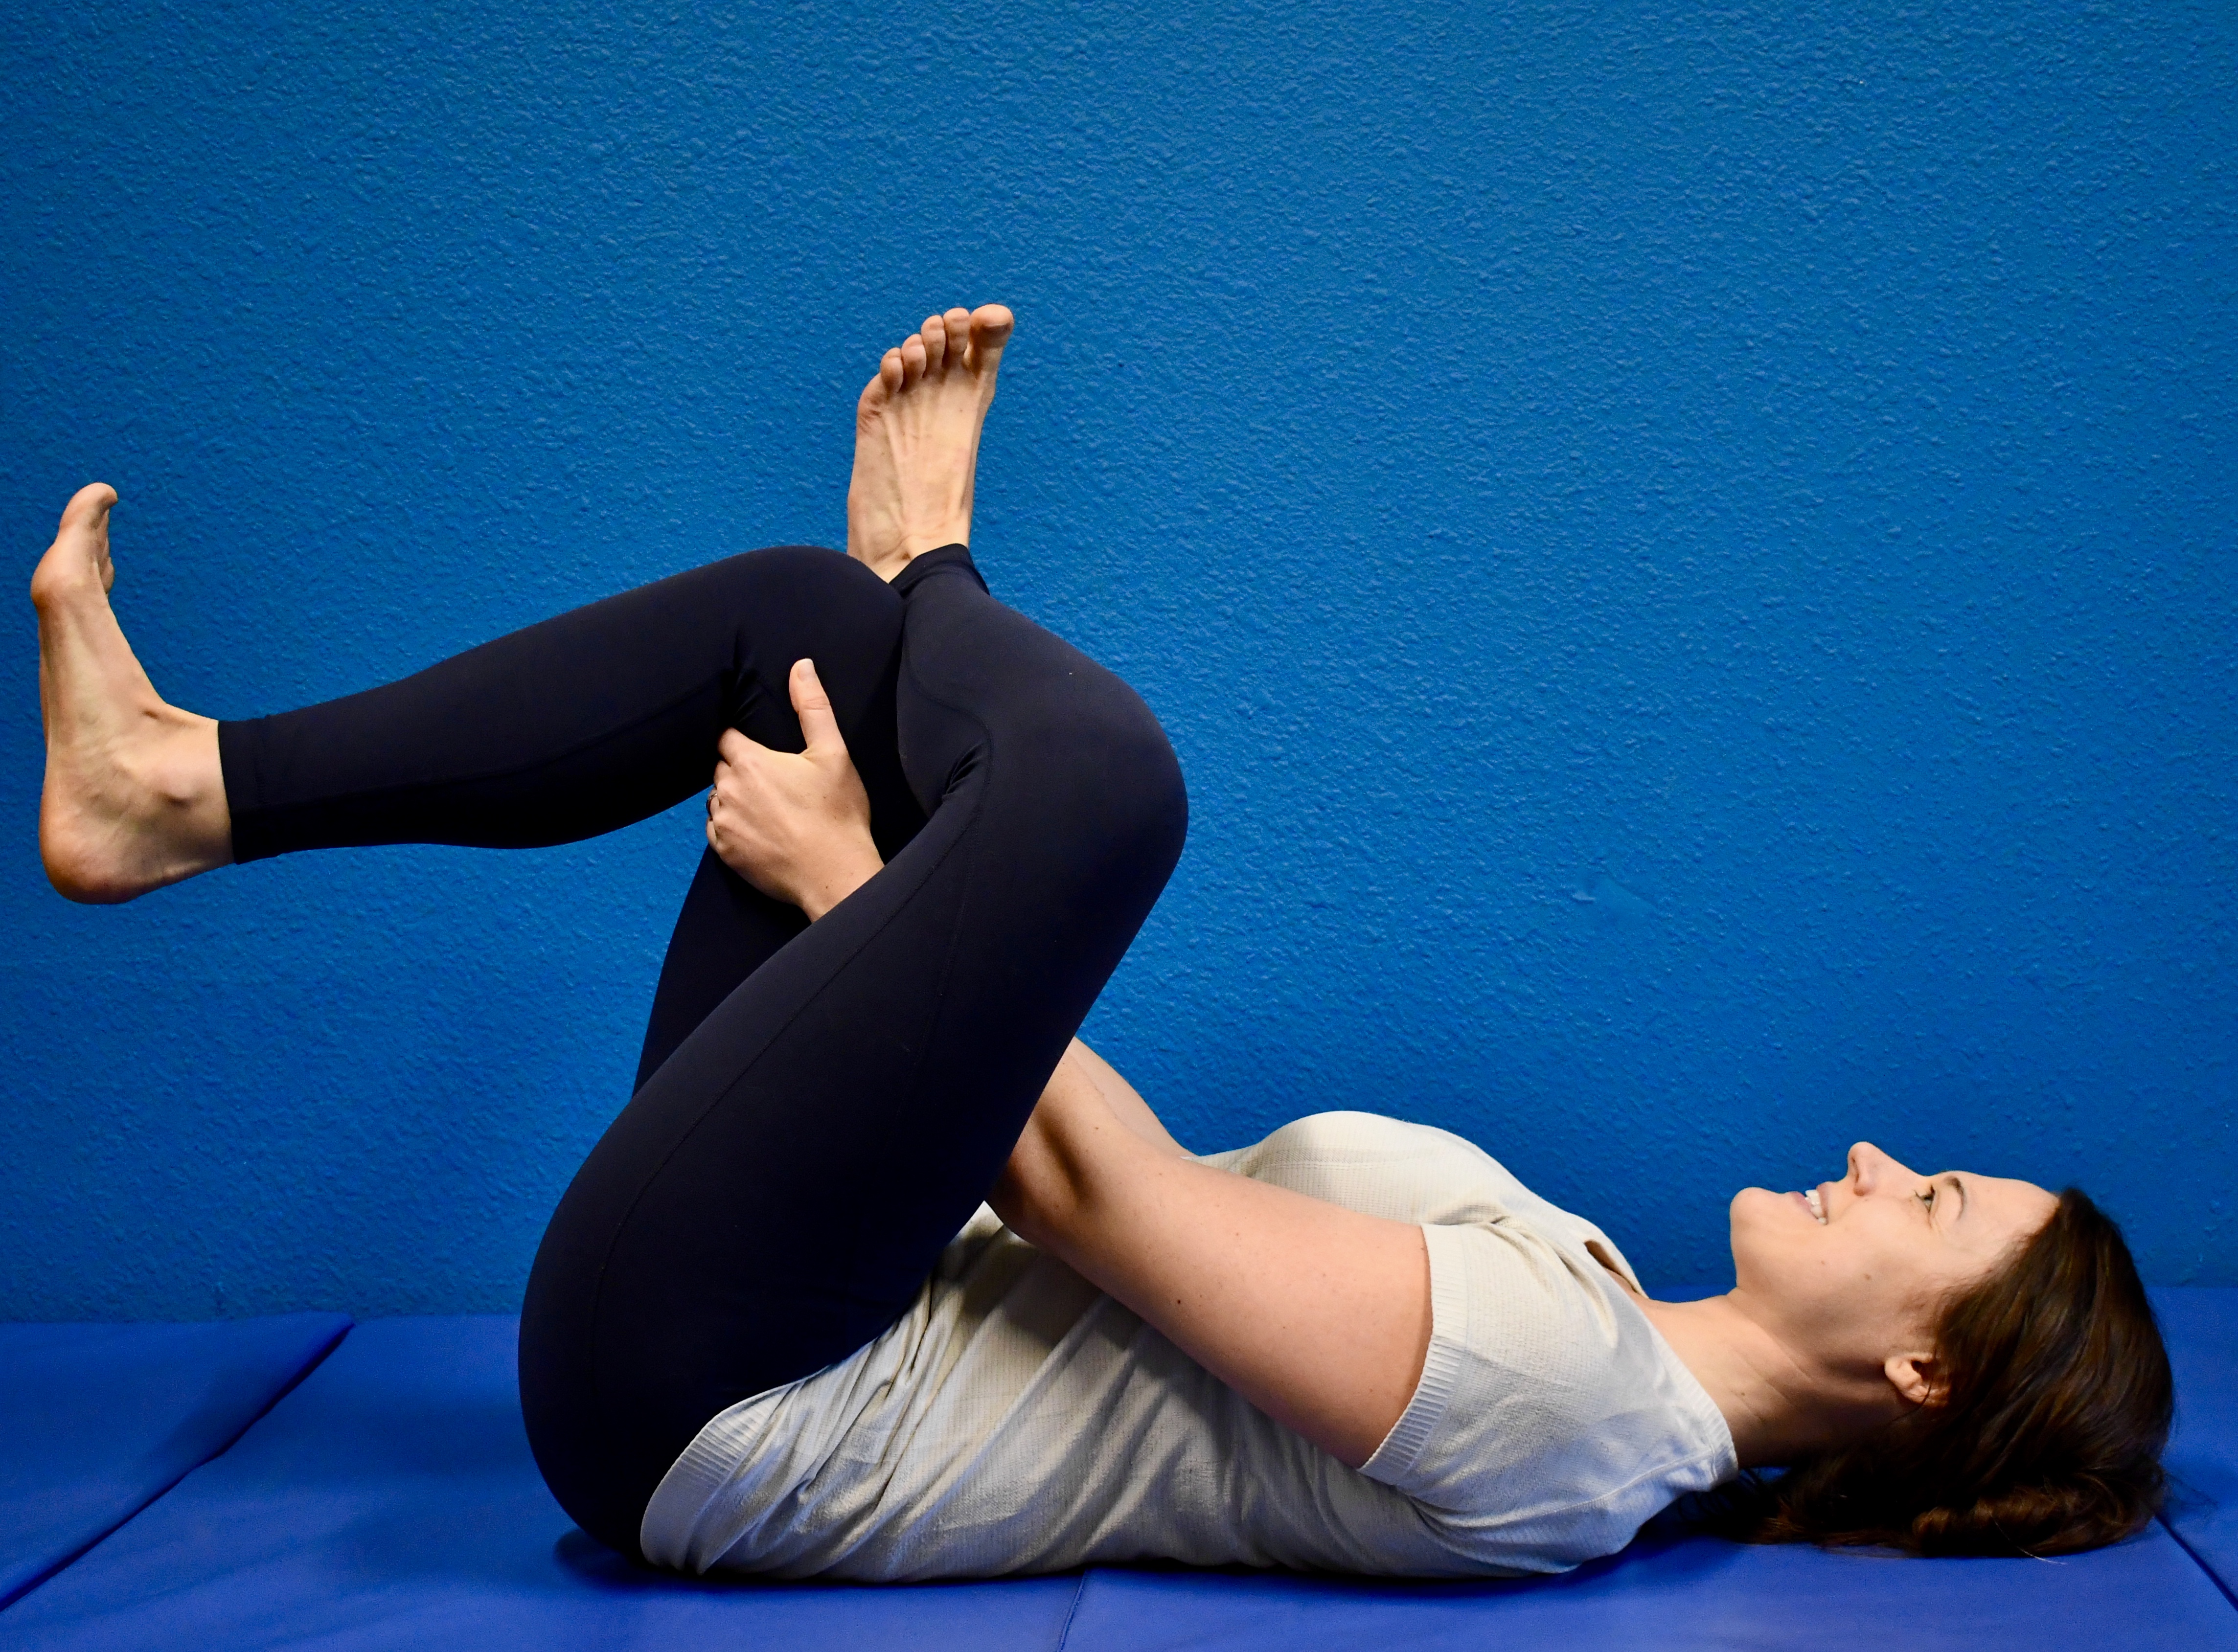
Figure 4 Stretch
Why it’s great
- Targets glute muscles, hamstrings, quads, and groin muscles if pressing outward with the elbow.
You have numerous glute muscles and this will target one, in particular, the piriformis. If you have issues with sciatica, this probably looks like a familiar stretch. If you press your elbow into your crossed leg, you get a bonus hip/groin stretch. This is an especially helpful stretch at the end of the day.
To Perform
- Begin by lying on your back.
- Bend the knees, heels close to hips and cross one ankle over the opposite knee.
- Reach around to grab the back of your non-crossed leg.
- Pull up toward your chest, feeling a stretch in the glutes.
- You can press your elbow into your crossed leg at the knee for an added groin stretch.
- Repeat on the opposite side.
- Hold 20-30 seconds, repeat 3-4 times daily.
Heel Sit
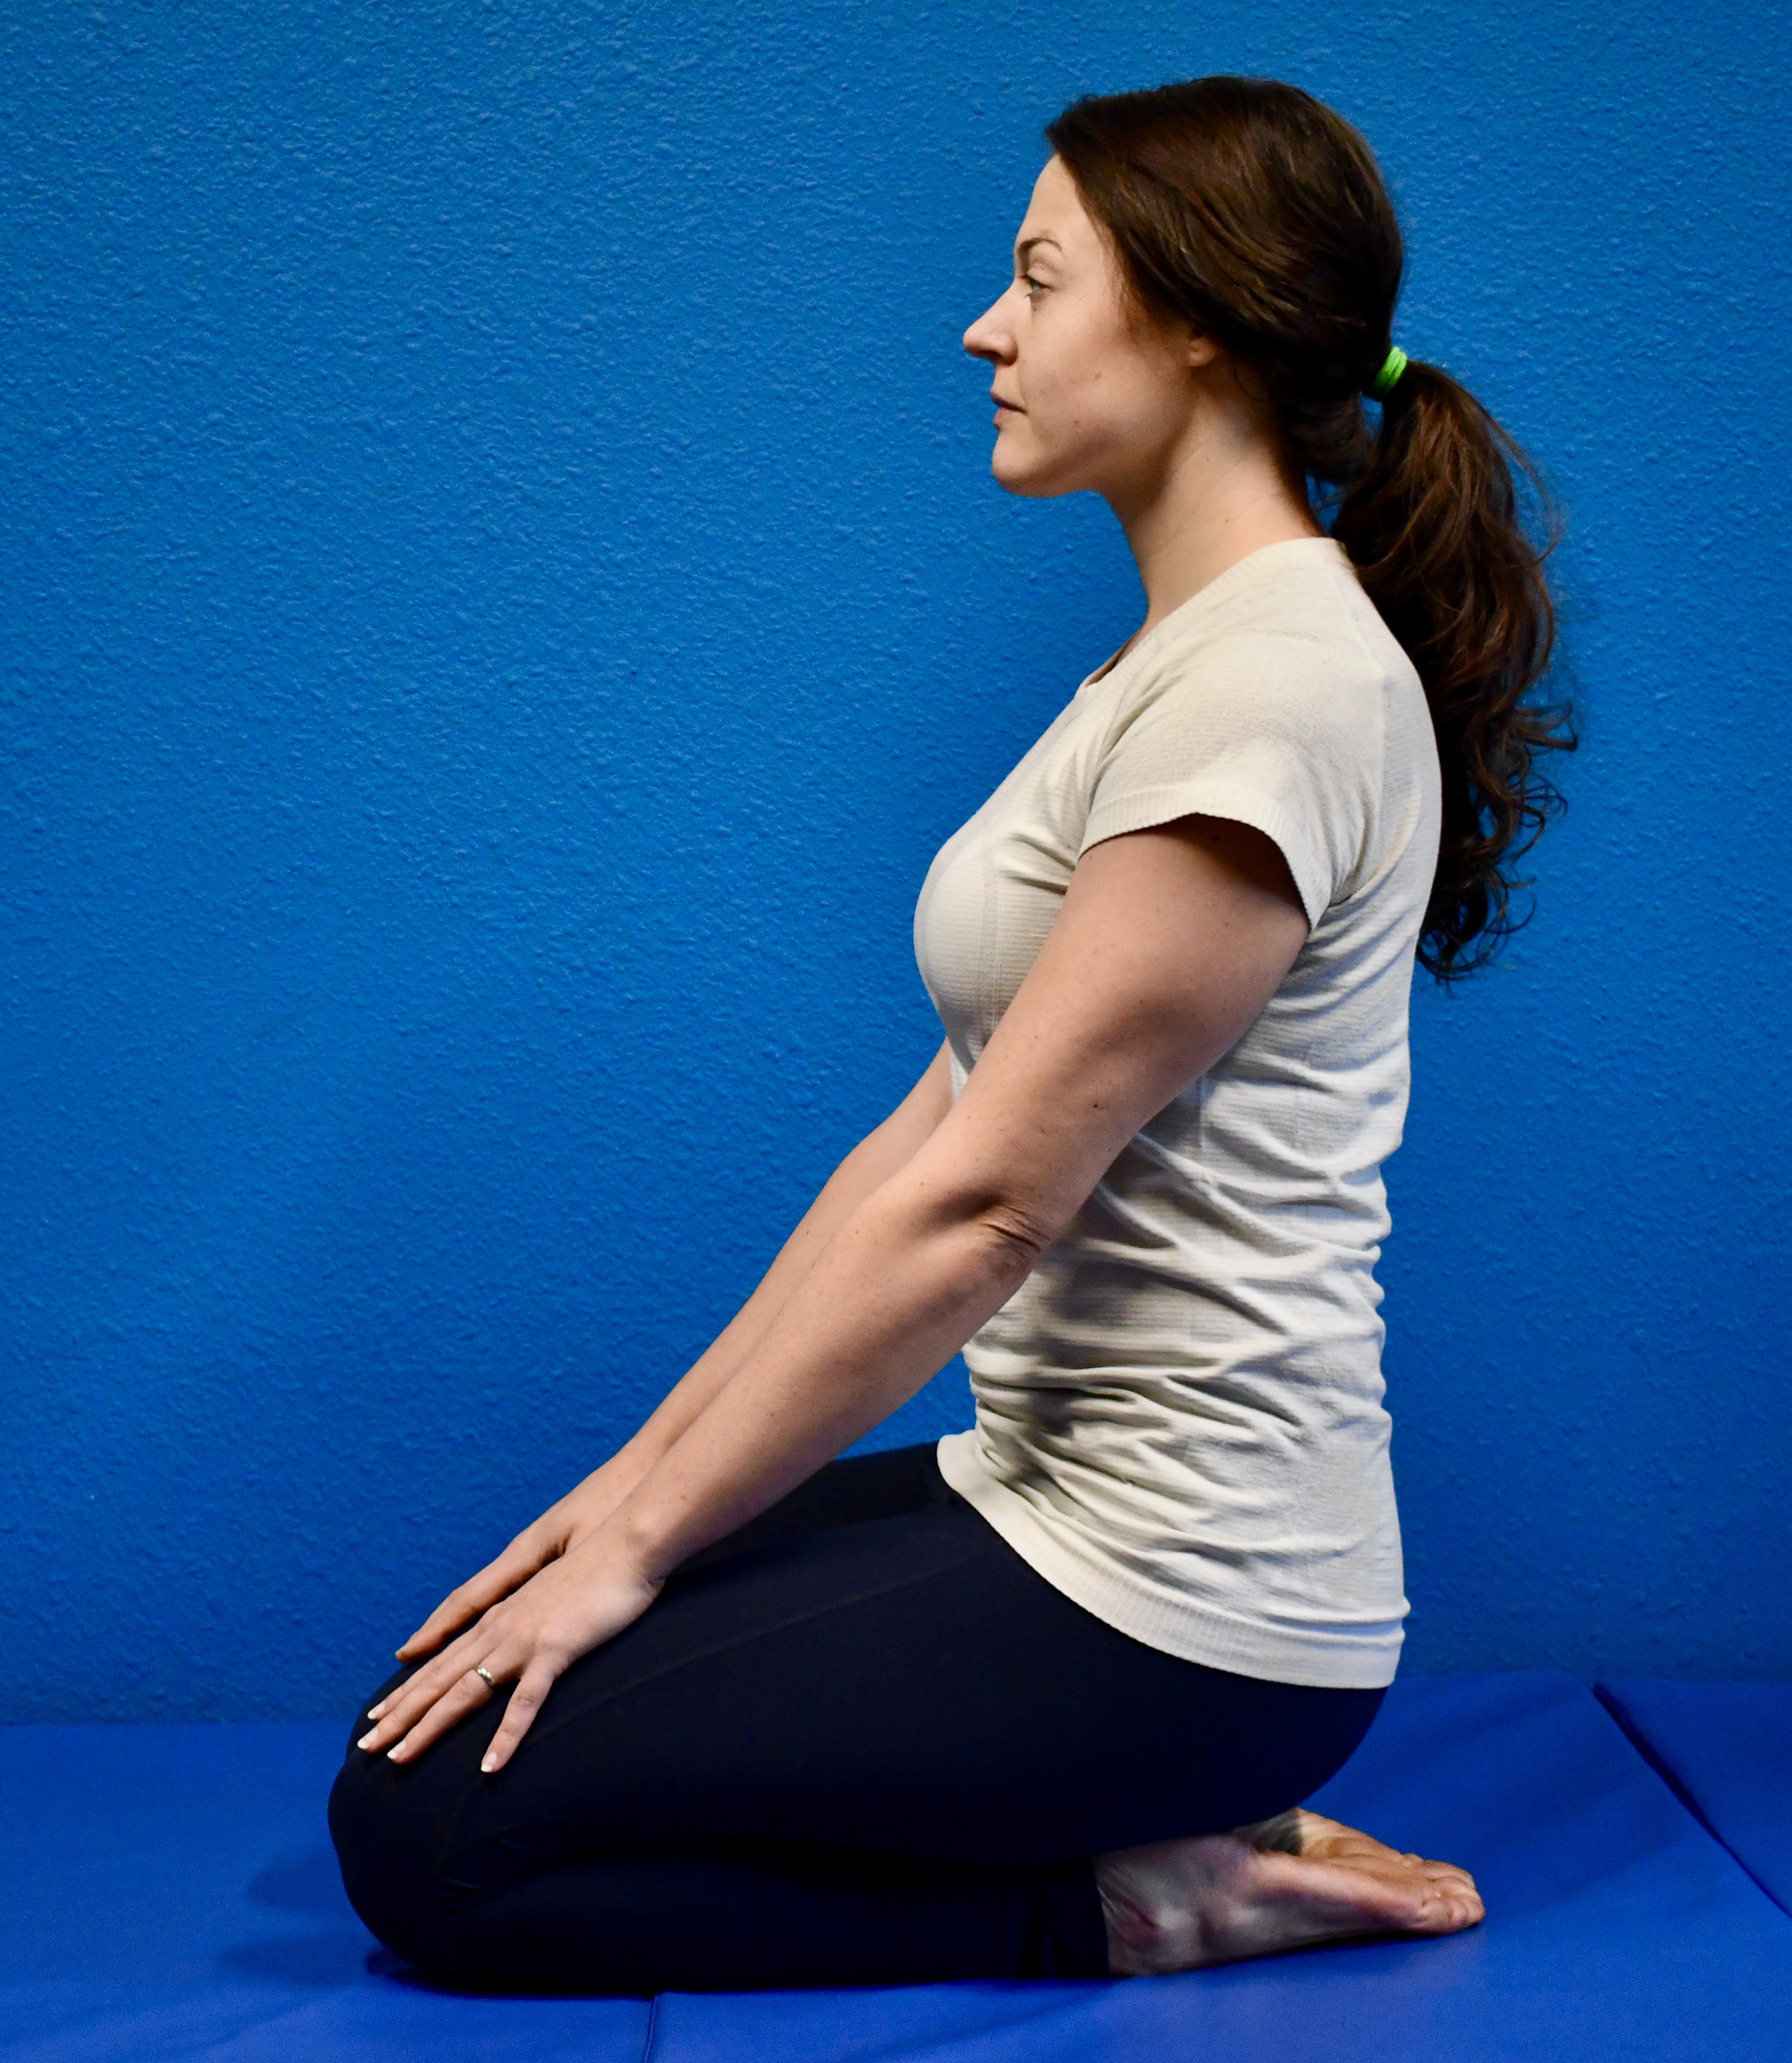
Heel Sit
Why it’s great
- Targets thighs, knees, ankles, shins, arches
This is magic for tight shins, ankles, and knees that feel like they have cotton stuffed in them. I like this one at lunch and camp each night; or even after a long day hike. It’s really amazing for knees and tight ankles!
To Perform
- In a kneeling position, ease your butt back towards the ankles. Aim to keep the weight centered between your feet, (not leaning one way or the other).
- Place a towel, stuff sack or similar between your butt and heels if needed.
- Keep your spine long and tall, avoid leaning forward.
- Ears should be over your shoulders, shoulders in line with hips.
- Practice 1-3 minutes, repeating throughout the day.
- If the knees experience discomfort, try a rolled up shirt, towel or similar placed between the calf and the back of the leg behind the knee.
Shout out to “Full Sail” PCT class of 2018 for being the model for these!
You can reach me info@trailsidefitness.com with any injury issues, past or present that you feel will impact your hike. Training questions are also welcome – I am happy to help and just want you to rock your hike!
Recent Comments